Part 15 - Materials.
It might be nice to make these things look better now?
Objects in Unity are assigned Materials which define how they look. These in-turn have their own separate components, Textures, Shaders and other things, which build up how the GPU finally draws them to the screen.
In our case we just want to change the Material definition and change a few parameters on it.
However… Probuilder changes the default workflow for this.
But first let's do the steps that haven't changed first and create a Material in the assets folder.
Under 'Assets' in the Project view, create a folder called 'materials'.
In the 'materials' folder Right-Click go to Create > Material and call it 'coin'
Here is where things change from the normal flow. We would usually just change the Material Component in the 'coin' prefab and it would be picked up across the board. But not with Probuilder in place.
Go to the 'coin' object in the Hierarchy.
Click on "Open Probuilder" in the Inspector if Probuilder isn't already open.
In the ProBuilder window there is a 'Material Editor' option. Click on this. We get a new window opening up
Git repository: https://bitbucket.org/hiveit/unity-tutorial-coin/src/011_AddingMaterials/
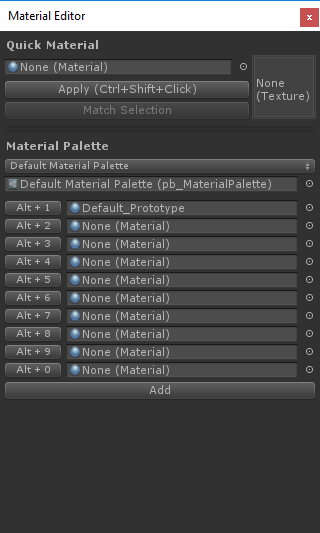
Under 'Quick Material' at the top, there is the "None (Material)" option and just to the right a little circle with a dot. Click on the circle with a dot. It will open a window with all the Materials in the project.
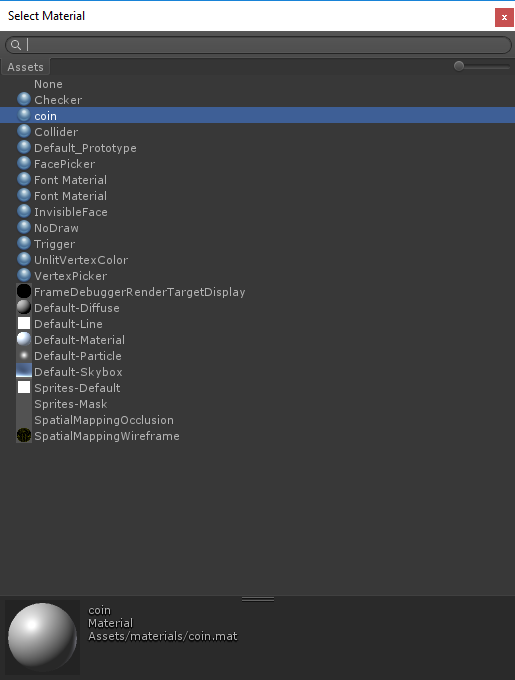
Select our coin Material.
We can now apply this Material to the 'coin' object by clicking on 'apply'... assuming that 'coin' is still the selected object of course.
In the Inspector the Material should have changed…

We want to apply this change to the "prefab". To do this, at the top of the "Inspector" is an "Apply" button. This applies all changes made in the GameObject to the asset. So you can edit an asset in the Scene and apply changes to it, being able to see these changes is useful.
Now, we have a Material for the coin, we can change the colour of the coin.
Click on the coin material.
In the Inspector click on the white box next to "Albedo". "Albedo" being a term for 'diffuse' colour. Which is the main colour that the object reflects in all directions from lights.
I'm going fairly stereotypical and making my coin a little bronze-like colour.
As this Material is something applied to the coin Prefab it will apply to everything without any more work and the game can just run now.
But there is a small problem. We moved the coin. When we pressed "apply" it applied the "position" to the prefab too.
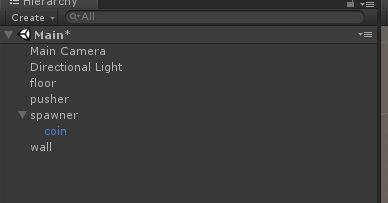
However, that coin should really be part of the spawner. So drag it to the Spawner object
It will update its position to 0,0,0 to reflect its position relative to its new parent. You can also apply the changes to the prefab now.
Everything should work as they should when running the game again.
We probably want to make the Machine itself look better too now.
So let's create another Material, called 'machine' I guess? I just made it a grey colour.
Using the Probuilder material editor to apply it to the floor, pusher and wall objects in turn.
Letting it run for a bit…
More posts in this series.
- Part 01 - Installation
- Part 02 - Concepts
- Part 03 - Navigation
- Part 04 - Git and Unity
- Part 05 - Building a project
- Part 06 - Adding some plugins
- Part 07 - Creating some objects
- Part 08 - Physics
- Part 09 - Pushing things & animation
- Part 10 - Pushing coins
- Part 11 - Custom Scripting
- Part 12 - Spawning things
- Part 13 - It is still too fast
- Part 17 - Keyboard input - Fire
- Part 18 - Keyboard input - Movement
- Part 19 - Deleting Coins
- Part 20 - Walls
- Part 21 - Adding a GUI
- Part 22 - Adding the GameController
- Part 23 - Scoring links with events
- Part 24 - Refining the Game - Part 1
- Part 25 - Refining the Game - Part 2
- Part 26 - Refining the Game - Part 3
- Part 27 - More refinements
- Part 28 - Slowing the user down
- Part 29 - Some more changes