Part 09 - Pushing things & animation.
Let's make another 'floor' object…
Select the existing one, the floor in the Hierarchy
'Duplicate' it. The quickest way is to press Ctrl+D, this is "Duplicate" from either the context menu or the Edit > Duplicate option in the top menu.
This will create another copy of the object, with exactly the same Components (which includes the 'Transform' component, so it will be in same position). It will call it same as original, but start numbering it, with the number in brackets, so there should be a floor (1) object now.
Select the new object, and rename it pusher.
So we can see it. Move it up using the 'Green' arrow….
(Hopefully you got lucky like me and the coin isn't in the way…)

We're going to now animate the 'pusher'
Animation
Animation in Unity can be done through scripting, or you can attach an Animator and Animation Clips to objects.
The Animators are essentially big state machines. They go through different states, playing the attached animation clip and when finished, depending on certain conditions, they can go to a different state.
For example, take a humanoid character. It would have a 'Walking' state. This would have a walking animation clip which would play whilst they are in the 'Walking' state. Once it plays, at the end, it might just go back to an "Idle" state, where the character may just stand idly. This state may just loop back on itself. Until, the character moves forward again, at which point, the Walking state would be invoked again, the Walking animation clip would play, and so on.
In our case, we will just be creating a simple animation that loops, for the 'pusher'.
With the 'pusher' selected, open the 'Animation' window, by clicking on Window > Animation or pressing Ctrl-6.
It will open somewhere random. For me it was on my main monitor.
I dragged it onto the bottom pane, so it was part of the same screen and alongside the 'Project' & 'Console' tabs.
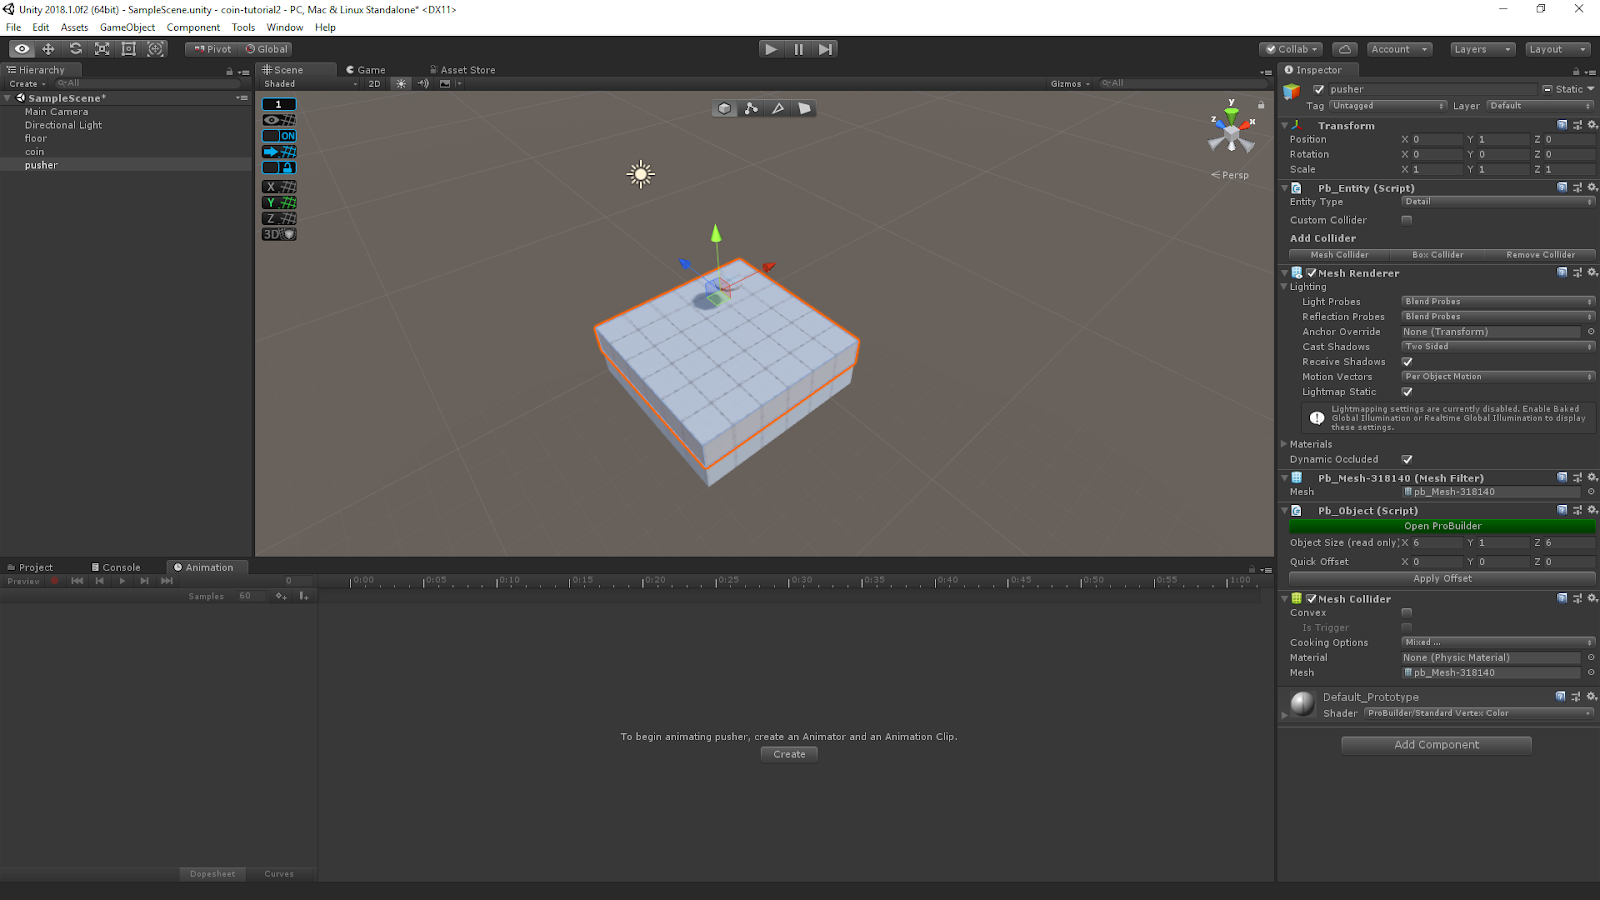
There is an instruction there…
"To begin animation pusher, create an Animator and an Animation Clip."
Click on "Create". A file window will open. It's best to start organising things now. Create a folder called animations and go into it. Save the "anim" file as "pusher.anim".
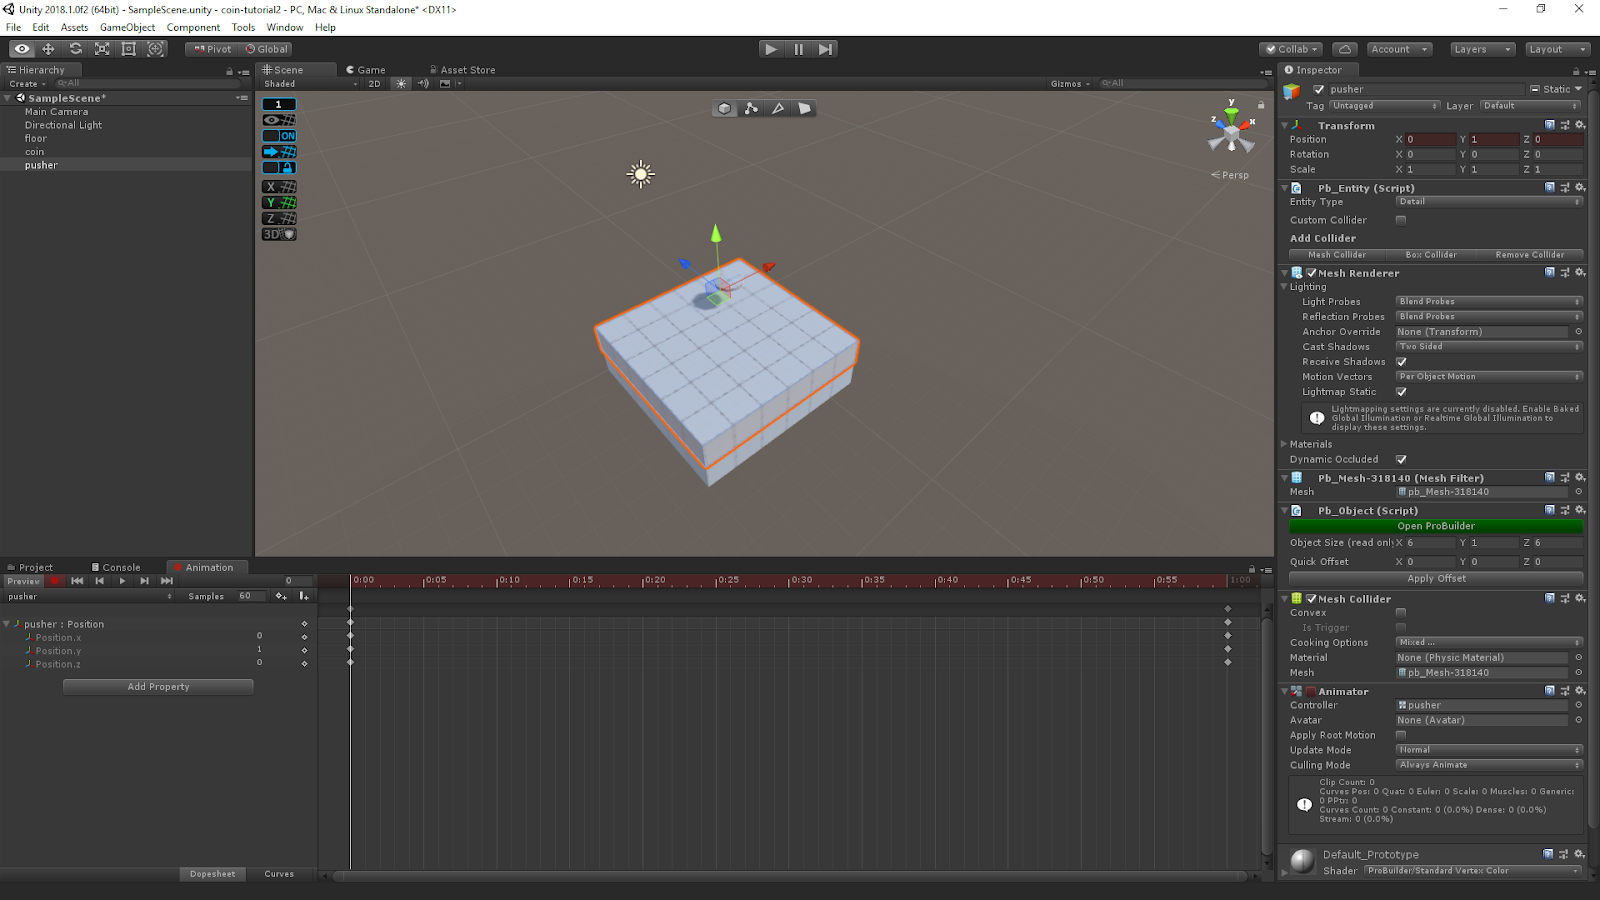
You will now be presented with the Animation "timeline".

However, before we continue… something to note, a new "Component" has been added to the pusher. You can see it on the right of the image, and comparing it to the previous image before we clicked "Create"
This is the "Animator". It is this that controls animations on an object. It has a number of attributes we will need to change later.
Now, the timeline.
Basically. An Animation Clip is a record of what a property is set to at a specific frame (or sample point). You can add any serializable property from any of the Components that the GameObject exposes.
In our case, we want to move the object, so we will be adding the Transform component.
To add this, in the "Animation" window, on the left, click on "Add Property". Expand the "Transform" item, and where it lists "Position" on the right, there is a plus symbol in a circle, click on this to add it to the list of properties.
You should now have this in the Animation window…

If you expand this, you get to see the individual Position.x, Position.y, Position.z components of the pusher : Position attribute.
We now want to move the pusher around.
But first we want to also start 'recording' so that the position is recorded to the Animation Clip as we do things to it.
Press the "Record" the usual red circle, at the top of the Animation window. The Timeline should turn red
Just to let you know it's recording.
Let's move the pusher. With the blue/Z arrow, move it back to the edge of the other one.
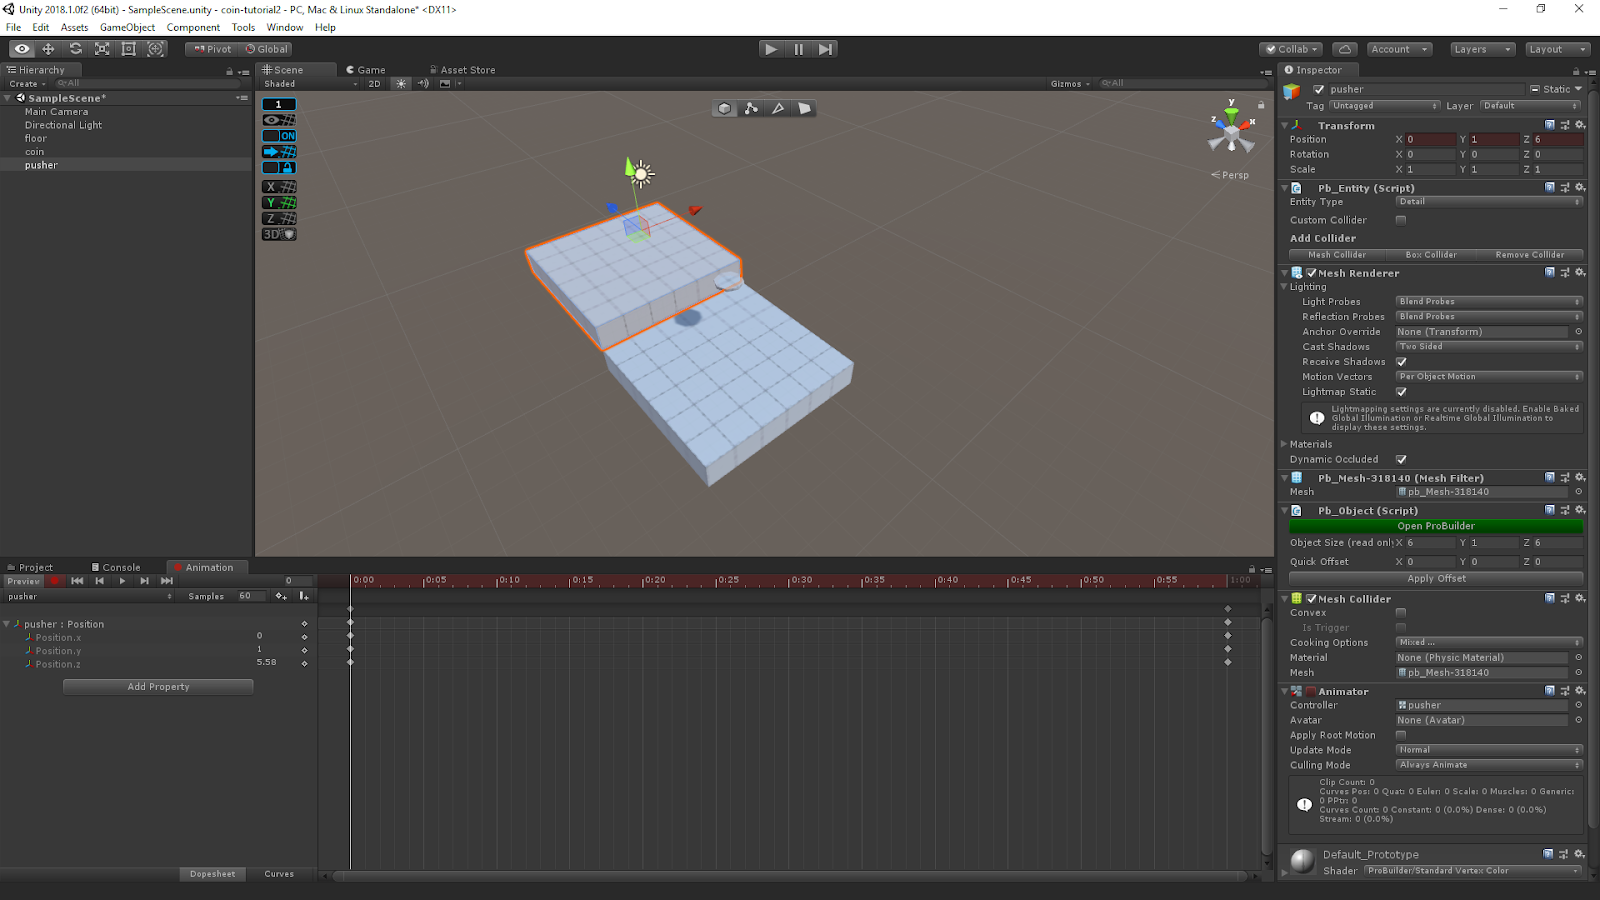
If you look in the Animation window, the Position.z will update to reflect the position you have just moved it to.
Now in the Timeline, click where it says "0:30" to move the time to that position.
The object will move. This is because at time "1:00" it had already recorded the position from where it was originally. It has "interpolated" between the two times and calculated this is where it would be if it moved smoothly between them during this time.
However, it is not really where we want it to be. It needs to be further forward, so it pushes things off…
Again, using the Z (blue) arrow…

And finally, click at the time mark of "1:00", making sure it really is at 1:00, it's a little finicky and may not be 1:00. There is a number to the left of the Timeline that says where the cursor is placed.
We want the slider to be back at the far edge now, so when you have moved the time to 1:00, slide the pusher back to the edge…

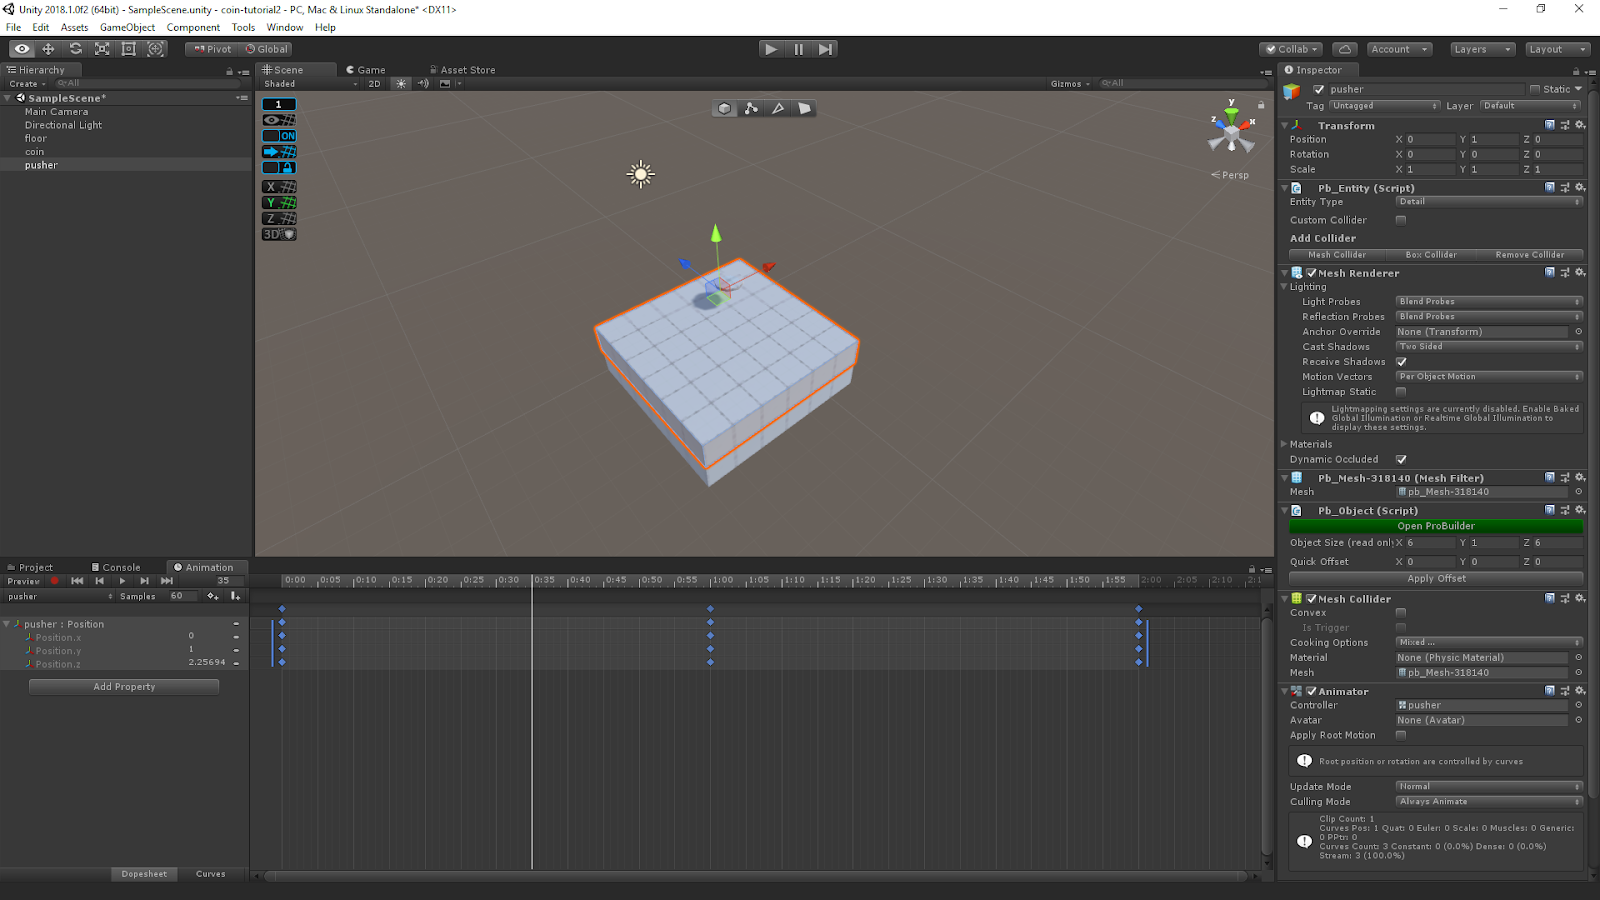
Once this is done, press the "record" button again to stop recording changes in objects.
To see the animation on the object, press the "Play" ( usual > like ) button.
It may be a little fast. There are numerous ways to slow it down. The easiest and quickest way to see a response from here is to just spread out the Animation Clip.
Zoom out, using the Scroll Wheel, until you can see the 2:00 time marker.
Select all the markers on the timeline by dragging with the mouse. There will be a vertical bar on the right of them. You can drag this to extend them along the timeline. As all of them are selected they will scale linearly. As you drag it will give the end time and let you drop them where you want. I dragged so they were are 2:00 so it halved the speed of the pusher.
Select the pusher and you can press play again to see the change in speed.
Running it all is another matter. The pusher is static and doesn't move…. doh!.... Make it not static (in the top of the Inspector). And it should now animate. It doesn't push coins yet though.
Also, at this point, I found it useful to move the coin up by one.
So I currently have:
Git repository: https://bitbucket.org/hiveit/unity-tutorial-coin/src/006_AddAnimation/
More posts in this series.
- Part 01 - Installation
- Part 02 - Concepts
- Part 03 - Navigation
- Part 04 - Git and Unity
- Part 05 - Building a project
- Part 06 - Adding some plugins
- Part 07 - Creating some objects
- Part 11 - Custom Scripting
- Part 12 - Spawning things
- Part 13 - It is still too fast
- Part 14 - Coins are piling up
- Part 15 - Materials
- Part 16 - User control
- Part 17 - Keyboard input - Fire
- Part 18 - Keyboard input - Movement
- Part 19 - Deleting Coins
- Part 20 - Walls
- Part 21 - Adding a GUI
- Part 22 - Adding the GameController
- Part 23 - Scoring links with events
- Part 24 - Refining the Game - Part 1
- Part 25 - Refining the Game - Part 2
- Part 26 - Refining the Game - Part 3
- Part 27 - More refinements
- Part 28 - Slowing the user down
- Part 29 - Some more changes